Generating a water effect, part 2.
Writing the shader, generating the surface details. Generating a water effect, part 1. SVG and Canvas This is a 3 part breakdown of how this water effect works, you can view the finished demo here…medium.com
In the first part of this series we looked at generating the texture that goes on top of the water which looks like this, using SVG and canvas:
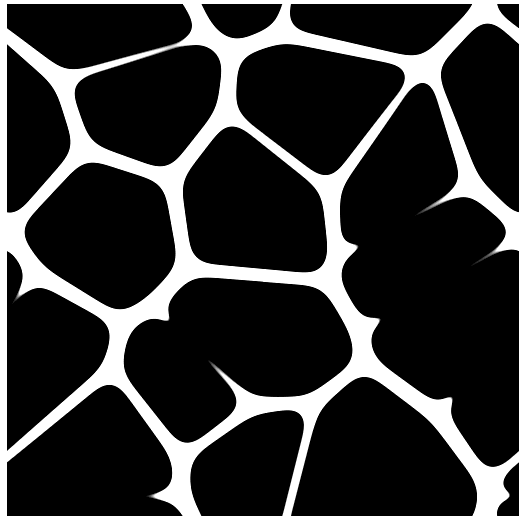 Output image of the first article. A tiling pattern made of black blobs.
We can now use this texture when writing our shader.
What is a shader?
A shader is software which runs on a graphics card describing how the vertices of a 3D model are distorted and how it is coloured in on the screen.
As well of the shaders used to show it a model is usually described by a set of triangles and textures which are images that get wrapped around the model.
The first shader is the Vertex shader. The Vertex shader is run for every vertex (corner) of every triangle of the 3D model. A typical simple Vertex shader will convert a vertices coordinates in 3D world space and convert them to the co-ordinates on the screen.
varying vec2 vUv;

void main() {
  vUv = uv;
  gl_Position = projectionMatrix * modelViewMatrix *
    vec4(position, 1.0);
}
In this example we set the final vertex position gl_position in screen space to the position of the vertex position with the camera’s projectionMatrix and the combined transforms of the model and the camera modelViewMatrix applied to it.
The variable uv is the associated texture coordinate for that vertex, we assign it to the varying variable vUv to make it available in the fragment shader, so that we can use it when drawing the textures to the model. The x and y values of UV coordinates go from 0.0 to 1.0 in a square regardless of the shape of the attached texture.
The vertex shader has described the shape of the triangles to be drawn to the screen, the fragment shader is then run on every pixel within those triangles. This is used to colour them in. A simple fragment shader which just applies a colour based on the uv coordinates looks like this.
varying vec2 vUv;

uniform vec3 color1;
uniform vec3 color2;
uniform float opacity;

void main() {
  float degToRad = 0.01745329;
  float t = vUv.y;
  gl_FragColor.a = opacity;
  gl_FragColor.rgb = mix(color1, color2, t);
}
The “uniform” variables are set from outside the program letting us reuse the shader in different ways.
In this example we are mixing between color1 and color2 depending on the y-coordinate of the uv this will give us a nice 2 colour gradient.
By making variations on these two programs you can do amazing things very efficiently.
Writing our water shader
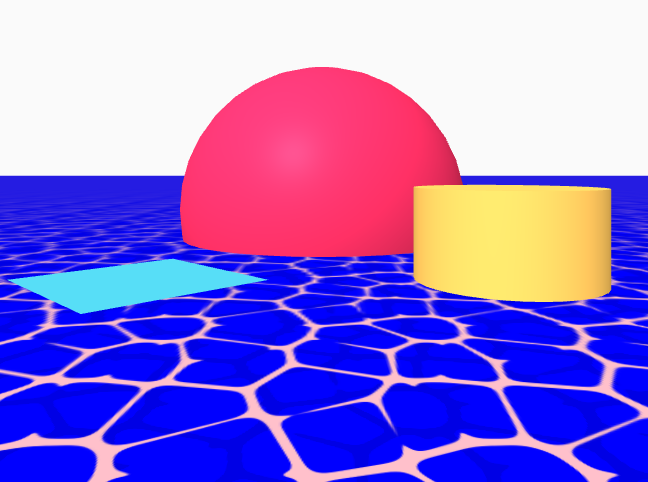
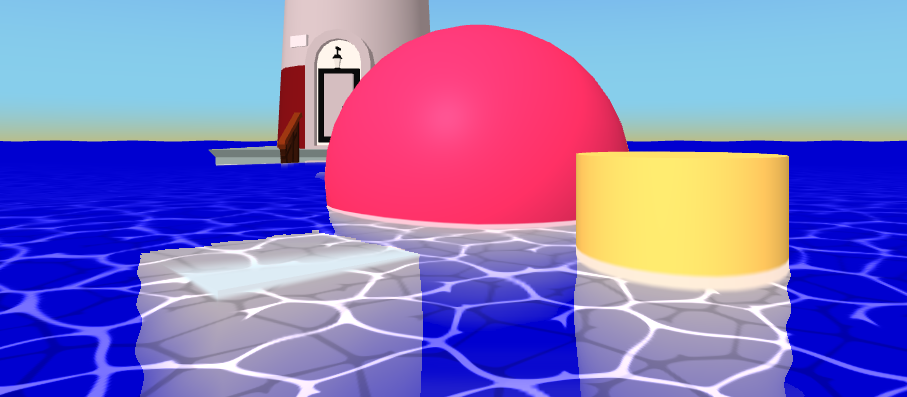 The final outcome after the final part of the article.
For this part of the article we will only focus on the surface details, the underwater parts of this example and the border where the water touches the other objects use complex techniques we will talk about in the final part.
We will be building this with AFrame but the techniques can be applied to THREE.js as well and also partly towards other environments where glsl is written.
To start we will make a flat plane which is 100x100 units large and divided 100 times in each direction. Which lies horizontally. This will be our water surface. I added it to the A-Frame hello world example to give some context to what we’re working on.
<a-plane material="shader:myshader;color1: red; color2: blue;" width="100" height="100" repeat="100" position="0 1 0" rotation="-90 0 0"></a-plane>
I set material to shader:myshader;color1: red; color2:blue; to load the custom shader, with some uniforms set, and I added a very basic shader to it to make sure it is working:
AFRAME.registerShader('myshader', {
  schema: {
    color1: {type: 'color', is: 'uniform', default: 'red'},
    color2: {type: 'color', is: 'uniform', default: 'green'},
    opacity: { is: 'uniform', default: 1 },
  },
  fragmentShader: `
    varying vec2 vUv;

    uniform vec3 color1;
    uniform vec3 color2;
    uniform float opacity;
    uniform float angle;

    void main() {
      gl_FragColor.a = opacity;
      gl_FragColor.rgb = mix(color1, color2, vUv.y);
    }`,

  vertexShader: `
    varying vec2 vUv;

    void main() {
      vUv = uv;
      gl_Position = projectionMatrix * modelViewMatrix * vec4(position, 1.0);
    }
  `
});
If you want to follow along in code, I have made a sample project you can remix to play around with writing your own shaders:
[Sample embed removed because glitch no longer exists]
We’re now ready to start writing the water shader.
Bringing in the material we made.
In the first part of this series we made a tiling image and exposed it as a THREE.CanvasTexture we can use this in our code assigning it to a map in the shader.
**Note: **You can’t define shaders or components in a script which gets deferred until after the HTML is parsed. This means that if you need to use
Step 1. Add a new map uniform to the material, this is done in the schema part of registerShader. We then import it into the shader code with uniform sampler2D map; and use this map using the texture2D function. We’re multiplying it by 100.0 to make it repeat many times.
AFRAME.registerShader("**water**", {
  schema: {
    **map: { type: "map", is: "uniform" }**
  },

  fragmentShader: `
    varying vec2 vUv;
    **uniform sampler2D map;**

    void main() {
      gl_FragColor = **texture2D( map, vUv*100.0 )**;
    }`,

  vertexShader: `
    varying vec2 vUv;

    void main() {
      vUv = uv;
      gl_Position = projectionMatrix * modelViewMatrix * vec4(position, 1.0);
    }`
});
**Step2. **Apply the texture we made earlier to the material. This is done in an Aframe component to assign the material’s map property which we defined in the schema in the last step.
AFRAME.registerComponent("**water-helper**", {
  async init() {
    const {**generateCausticCanvasTexture**} = await import("./waterTexture.js");
    this.el.setAttribute('**material**', '**map**', **generateCausticCanvasTexture**(15));
  }
});
Because we couldn’t use JS modules to import our script I did it dynamically using import(“waterTexture.js”) in the init. Which works fine.
**Step 3. **Add our new shader and component to the entity we made.
<a-plane **material="shader:water" water-helper** width="100" height="100" repeat="100" position="0 1 0" rotation="-90 0 0"></a-plane>
Finally test it:
The texture is in and works! It tiles nicely. The code within the glitch project I made earlier is here:
[Sample embed removed because glitch no longer exists]
Recolouring our texture
To let the user define the colours we will add two new variables to the schema. The nice thing about using the type:”color” uniforms is that AFrame will automatically convert from HTML colour codes into a vec3 with each channel set between 0.0 and 1.0.
schema: {
  map: { type: "map", is: "uniform" },
  **basecolor: {type: "color", is: "uniform", default: "blue" },
  foamcolor: {type: "color", is: "uniform", default: "pink" }**
},
fragmentShader: `
  varying vec2 vUv;
  uniform sampler2D map;
**  uniform vec3 basecolor;
  uniform vec3 foamcolor;**

  void main() {
    gl_FragColor.a = 1.0;
    vec3 color = texture2D( map, vUv*100.0 ).rgb;
    **gl_FragColor.rgb = mix(basecolor, foamcolor, color.r);**
  }`,
This sets the output colour to the basecolor if the texture is dark and the foamcolor if it is light.
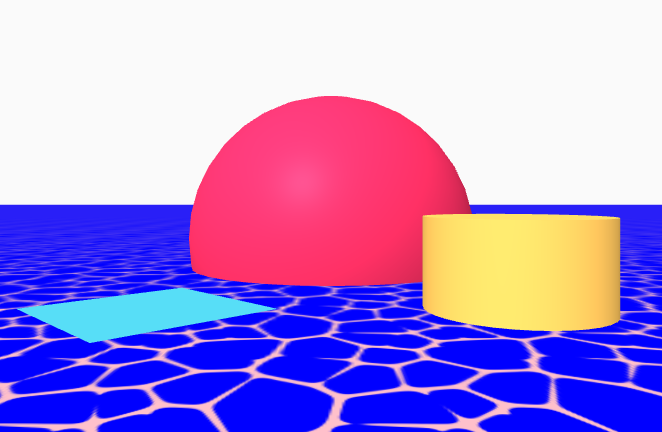 The foam is pink the water is blue
Animating the water effect
To animate something then something will need change with respect to time. We can bring in a time property with the time uniform which is the time in milliseconds.
schema: {
  map: { type: "map", is: "uniform" },
  basecolor: { type: "color", is: "uniform", default: "blue" },
  foamcolor: { type: "color", is: "uniform", default: "pink" },
  **time: { type: "time", is: "uniform" },**
},
fragmentShader: `
 varying vec2 vUv;
 uniform sampler2D map;
 uniform vec3 basecolor;
 uniform vec3 foamcolor;
 **uniform float time;**

void main() {
  gl_FragColor.a = 1.0;
  vec3 color = texture2D( map,
    vUv*100.0 + **0.2*vec2(cos(time*0.001), sin(time*0.001))**
  ).rgb;
  gl_FragColor.rgb = mix(basecolor, foamcolor, color.r);
}`
This moves the texture in a little circle, we multiply time by 0.001 since milliseconds is way too fast. So it now does one loop per second.
This effect is a start but doesn’t feel water like. What we can do is compress and stretch certain areas by having the distortion depend on the UV coordinates. By having some parts stretched more than others is a great way to hide that the pattern is a tiling pattern.
vec3 color = texture2D( map,
  vUv * 100.0 +
  0.5*vec2(
    cos(time*0.001*0.1),
    sin(time*0.001*0.1)
  ) +
  0.1*vec2(
    cos(time*0.0012+3.2*100.0*vUv.x),
    sin(time*0.001+3.0*100.0*vUv.y)
  )
).rgb;
There are lots of ways to tweak this to get the animation to feel how you like. I’m going to reuse the texture for a second layer of water by sampling it again at a different coordinate.
vec3 color2 = texture2D( map,
  vUv * 130.0 +
  0.8*vec2(
    cos(time*0.001*0.1),
    sin(time*0.001*0.1)
  ) +
  0.01*vec2(
    cos(1.7 + time*0.0012+3.2*100.0*vUv.x),
    sin(1.7 + time*0.001+3.0*100.0*vUv.y)
  )
).rgb;
gl_FragColor.rgb = mix(basecolor * clamp(1.0 - color2, 0.9, 1.0), foamcolor, color.r);
The demo for this step is here: Shader Test Edit descriptionada-shader-starter.adarose.dev
The code is here:
[Sample embed removed because glitch no longer exists]
Adding transparency
To see the content underneath the simplest option would be to enable transparency on the material
<a-plane material="shader:water;**transparent:true;**" water-helper width="100" height="100" repeat="100" position="0 1 0" rotation="-90 0 0"></a-plane>
then set the alpha channel in the shader itself.
gl_FragColor.a = 0.5;
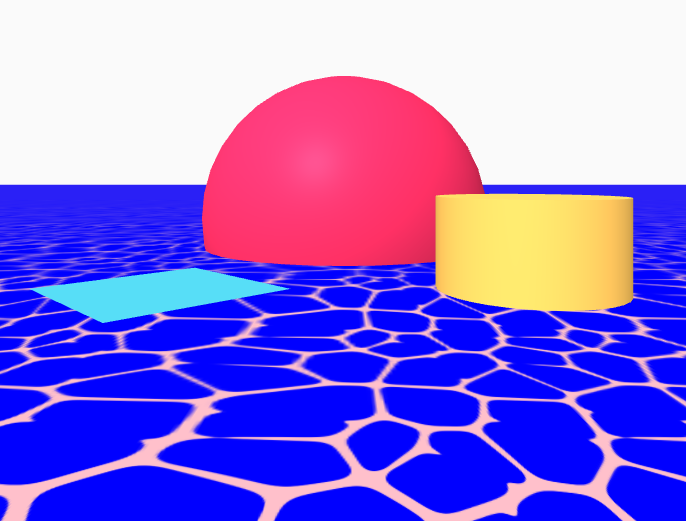
 Transparent water.
Making Waves
So far most of what we have been doing has been in the *fragment shader *the fragment shader is not the only place we can do interesting things, the vertex shader will let us change the shape of the surface of the water to give us waves!
Since we are editing the vertices we need to make sure there are enough of them so ensure there are enough segments of the plane:
<a-plane material="shader:water;transparent:true;" **segments-width="100" segments-height="100"** water-helper width="100" height="100" repeat="100" position="0 1 0" rotation="-90 0 0"></a-plane>
Then in the Vertex Shader we will add an offset to the position of each element to offset it by a little bit in the Z direction.
vertexShader: `
  varying vec2 vUv;
  **uniform float time;**

  void main() {
    vUv = uv;
    **vec3 newPos = position;**
    **float t = time*0.001;**
**    newPos.z += .05 * (
      cos(0.5*t+100.0*vUv.x) + sin(0.5*t+100.0*vUv.y)
    );**
    gl_Position = projectionMatrix * modelViewMatrix * vec4(**newPos**, 1.0);
  }
`
This now makes the water itself rise and fall in a pleasing way. The final code:
[Sample embed removed because glitch no longer exists]
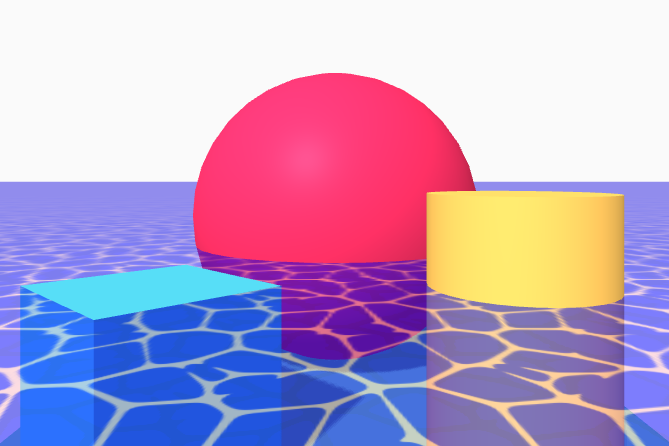
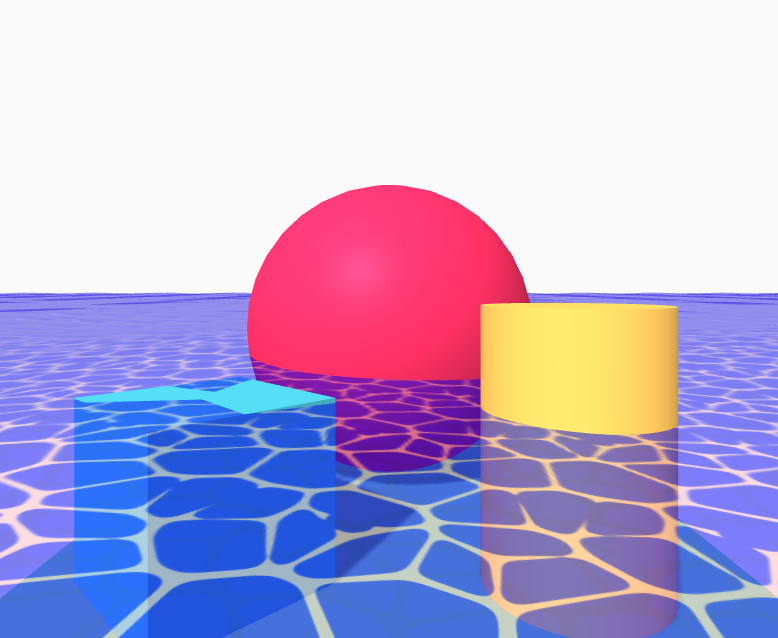
Adding depth
The opacity and the waves have a nice effect but it does introduce the artefacts at the back of the scene where the water overlaps itself.
Also deeper bits are just as visible as bits near the surface of the water. By knowing the depth of the geometry under the water we can do lots of neat effects to make it look really nice.
Getting the depth can be done by rendering the scene twice, once to get the depth then the final render to the screen. This gives a nice effect but currently has trouble in VR, once I have worked out the VR issues I will post Part Three describing how that is done.
By Ada Rose Cannon on March 2, 2020.