Using Houdini Paint API to Render a 3D Model
Using the CSS Houdini Paint API to show a 3D Model!
That’s f*cked up
— Daniel Appelquist, co-chair of the W3C Technical Architecture Group
The demo in this article uses the Houdini paint API, which is a part of the larger Houdini spec. Houdini is still coming to browsers but is ready to try out.
In this article I hope to inspire you to try out the Houdini Paint API. It’s really fun, and you can see just how powerful it is. Here I do something which looks cool but isn’t the most optimal way to show 3D models in the Web, but I hope it inspires you to see how far you can take the Houdini APIs.
What I made here was a stupid idea that went too far, but it worked! My thought process went like so:
-
The Houdini Paint APIs are kind of like the Canvas 2D APIs
-
THREE.js used to have a canvas renderer
-
With tree shaking the Houdini Paint Worklet won’t be so big.
-
I can control it with CSS Custom Properties!
Amazingly it worked:
Why is it a bad idea?
The Houdini paint worklet uses the CPU to render to the canvas, rendering a full 3D model is an expensive process to do without a graphics card. Fortunately worklets run on a seperate CPU thread so shouldn’t slow down the website too much, but if you repaint the object too much it may make the device’s fans spin up.
If you want to render 3D models in the Web use WebGL, it is what it is there for. WebGL is a lot more performant for rendering 3D scenes and will give a lot neater results.
Worklets can’t fetch resources from the network, so everything including the 3D model has to be baked into the Worklet script itself so can’t be changed on the fly.
The final worklet including the 3D model was 1100kb after minification!! It would be more efficient over the network to just use a video tag.
Constraints of the Houdini Paint Worklet
Everything in the PaintWorklet happens synchronously. It can’t access the state of the document nor can it use the network to asynchronously load resources. It also can’t import scripts either, everything has to be inlined.
So if you wanted to use a different 3D model you would have to recompile the whole script again.
Rendering is tied to the paint callback function of the worklet and cannot be called from within the worklet. So no setTimeout or requestAnimationFrame, or animation.
Breaking down how it works
The key element which makes this project work is the JavaScript bundler rollup. Rollup is a package bundler for JavaScript files which use ecmascript modules (es-modules). Rollup allowed me to combine packages from npm, json files and local packages with tree shaking to remove unused modules keeping the size smaller.
Fortunately newer builds of Three.js are built using ecmascript modules to allow developers to take advantage of this tree shaking behaviour. Unfortunately the old Three.js PaintRenderer used to do 3D graphics on a HTML Canvas had been removed before then.
To get around this I ported PaintRenderer and another module from an older THREE.js to use es-modules which allowed me to use only the bits I needed with a newer build of THREE.js to render the scene to canvas. Which was about ~500kb, whilst still large it is a significant saving compared to the full THREE.js.
Importing the 3D Model
This was tricky to get right and took some trial and error with different 3D model formats to get right. This was my final technique:
-
Download a Low Polygon 3D model from Google Blocks as a Triangulated OBJ. I used this model by Linus Ekenstam: https://poly.google.com/view/4PazXqve8xz
-
Add it to a new scene on https://clara.io
-
Export the scene as a Three.js JSON
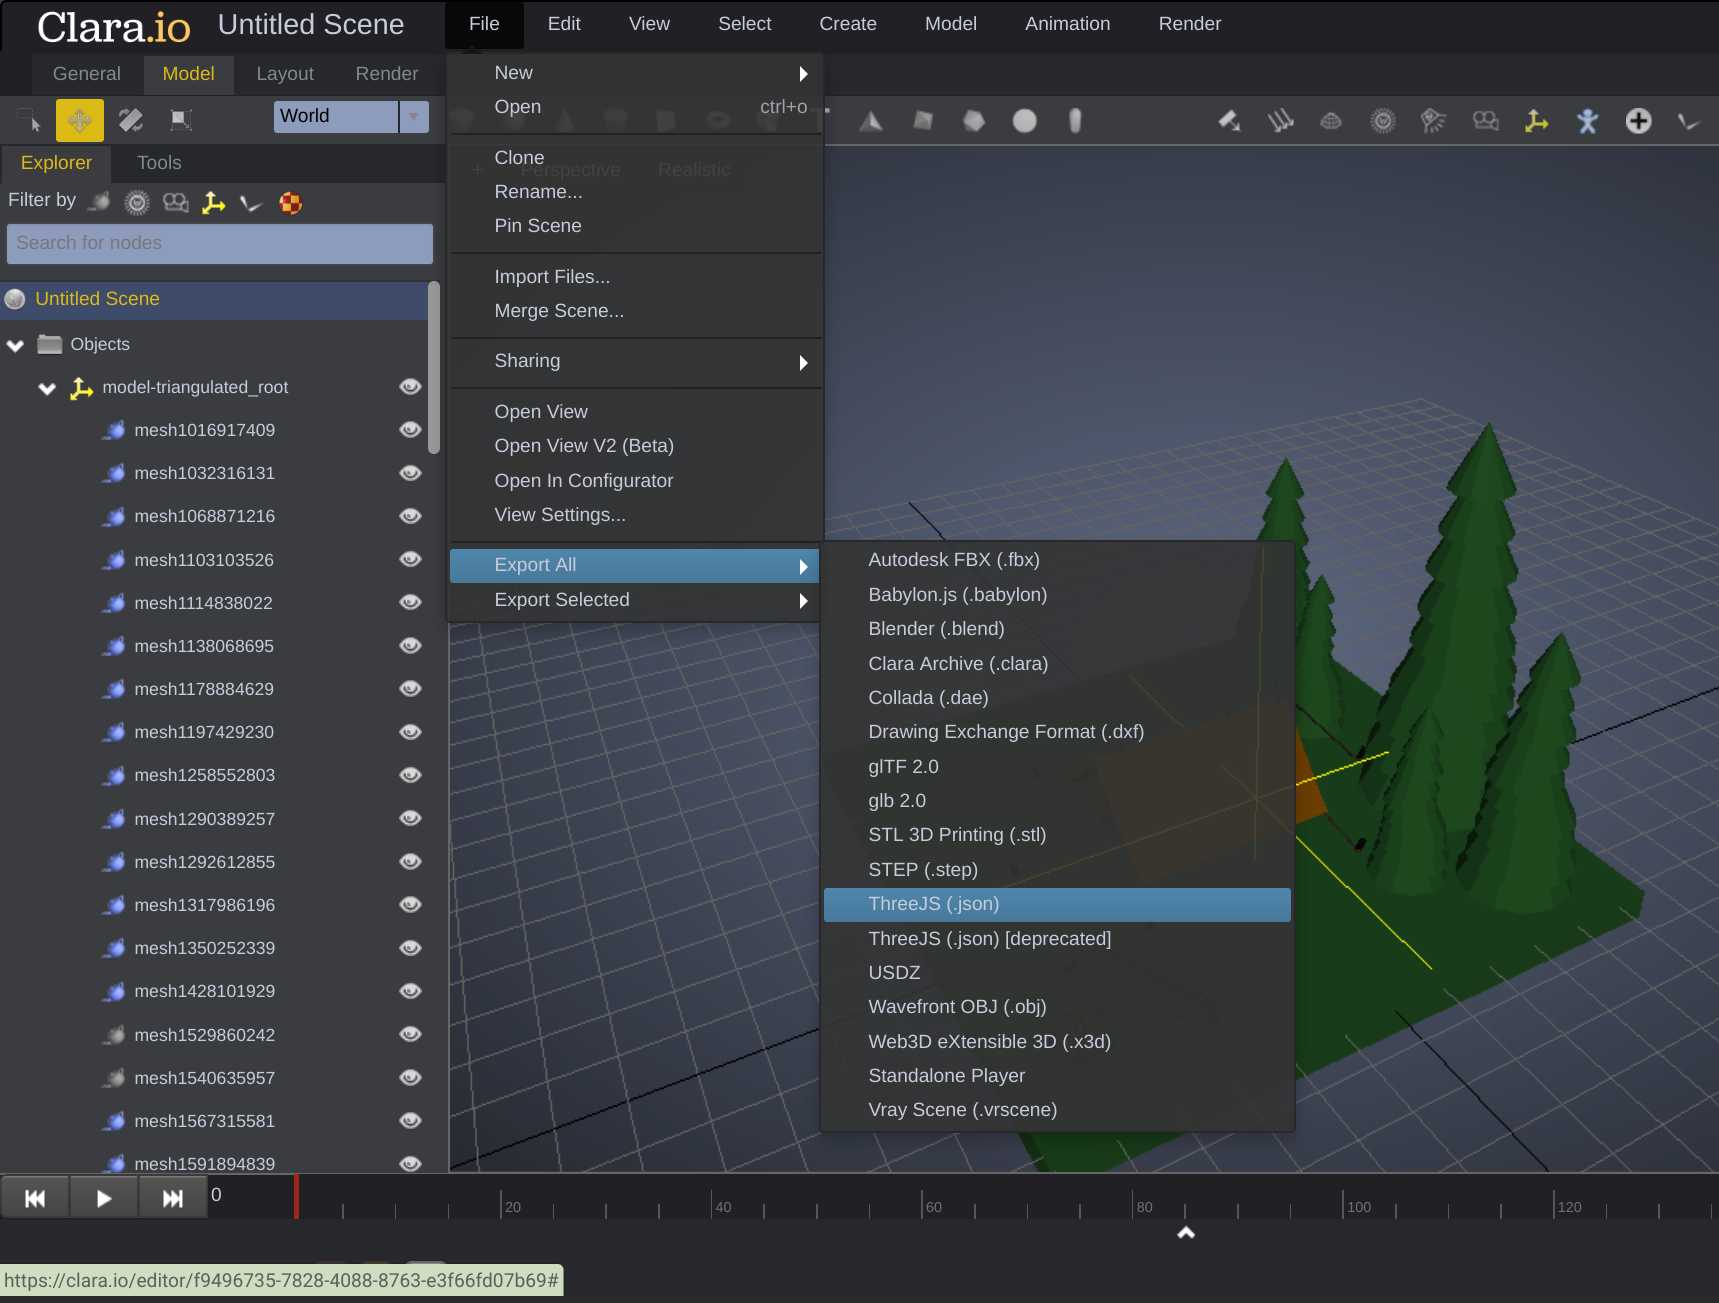 Export All Interface in Clara.io
- I then imported this JSON file using the Rollup json loader.
import * as campfire from './scene.json';
- Then I parsed this with Three.js and it was ready to use
const loader = new ObjectLoader();
const camp = loader.parse( campfire );
- I had to tweak it a little bit to make it to look good
const floorName = "mesh1292612855";
const floor = camp.getObjectByName( floorName, true );
floor.renderOrder = -1;
camp.position.y = -3;
camp.rotation.y = -Math.PI/2;
Now everything is imported we are ready to render it.
Setting up the Houdini Pain Worklet
To register a paint worklet in the worklet use the registerPaint function. Below we register a paint function called “three”.
registerPaint( "three",
  class {
    static get inputProperties() {
      return [];
    }

    paint(ctx, size, props) {
      camera.aspect = size.width / size.height;
      camera.updateProjectionMatrix();
      renderer.setContext(ctx);
      renderer.setSize(size.width, size.height);
      renderer.render(scene, camera);
    }
  }
);
In the paint method we have 3 arguments. ctx is a drawing context very similar to the CanvasRenderingContext2D you would get from a Canvas, although some methods are missing. size provides the width and height of the element you are drawing to. props is a map which provides access to the CSS custom properties requested from inputProperties.
In the paint function each render I update the camera to handle the new width and height of the element. I set the context of the renderer to the ctx to tell THREE.js to render there.
Now this is added we are ready to use the Worklet in CSS. This is how we apply it to an element:
main {
  background-image: paint(three);
}
We use paint(workletName) to draw tell CSS to use this worklet for the background image.
Controlling the Scene in Realtime
Even though all the assets have to be baked in we can provide the user some amount of control by responding to certain custom CSS properties.
In this example we will listen for rotations in the X,Y and Z axis. To do this add the CSS properties to the inputProperties array:
static get inputProperties() {
  return ["--rotate-x", "--rotate-y", "--rotate-z"];
}
You can register properties to define their type but to keep these simple we won’t do that here, because they are unregistered they get exposed as strings because CSS does not know how to handle them.
We will use them to rotate the 3D model, here I convert each rotation from a string in degrees to a number in radians so it can be used with THREE.js.
group.rotation.set(
  Math.PI * Number(props.get("--rotate-x"))/180,
  Math.PI * Number(props.get("--rotate-y"))/180,
  Math.PI * Number(props.get("--rotate-z"))/180
);
I can then set these properties to change the rotation in CSS:
main {
  --rotate-x: 10;
  --rotate-y: 90;
  --rotate-z: -50;
}
I can even set them dynamically with JavaScript:
document.addEventListener('mousemove', function (e) {

  document.body.style.setProperty(
    '--rotate-y',
    30 * ((e.screenX / document.body.clientWidth) - 0.5)
  )

  document.body.style.setProperty(
    '--rotate-x',
    30 * ((e.screenY / document.body.clientHeight) - 0.5)
  )

})
Be careful with animations
Animating the worklet like this is fun but it causes an expensive repaint every time. In fact animating any thing on this element which triggers paint will cause an expensive paint operation.
Have fun!
I hope this article inspires you to have a play with Houdini paint. It is fun to do and is one of a number of Houdini APIs allowing us to extend CSS to make it even more powerful.
By Ada Rose Cannon on May 16, 2019.